在WSL中使用代理
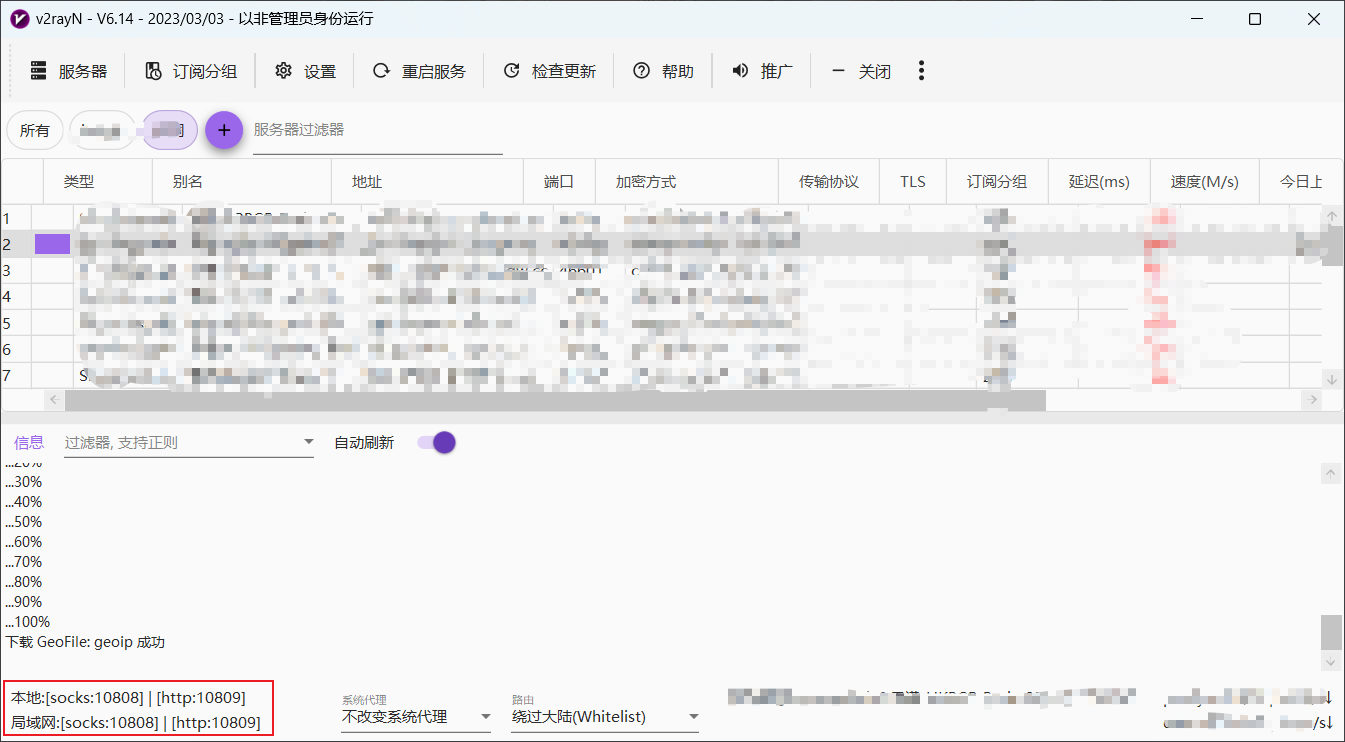
最终解决办法,打开Allow LAN选项,然后开启tun mode,注意必须要下载并启用service mode。1
在 wsl 中使用代理
原理浅析
下面这个脚本可以设置当前网络代理, 有的应用如果发现了这个环境变量就会自动使用代理
1 | export HTTP_PROXY="XXX" |
在 windows
宿主机上我们会设置 HTTP_PROXY="http://127.0.0.1:1080",
但是wsl 基于 hyperv, 使用的是独立的网络, 因此不能将 wsl 的代理地址设置为
127.0.0.1, 需要设置为 宿主机IP.
宿主机(也叫本地DNS) 定义在 /etc/resolv.conf 文件下,
可使用 cat 命令查看
1 | cat /etc/resolv.conf |

代理设置
使用脚本提取 IP 部分, 将其作为参数保存, 便于设置代理
1 | LOCAL_DNS=$(cat /etc/resolv.conf |grep "nameserver" |cut -f 2 -d " ") |
接下来设置代理:
- 将下面这段文字写入
~/.bashrc或~/.profile等登录后立刻执行的文件中 - 如果写在
~/.profile中, 需要source ~/.profile
1 | # ~/.profile |
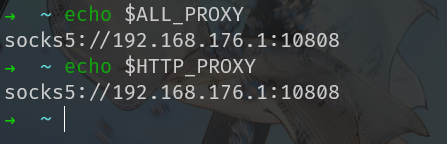
注意端口号需要和宿主机的端口号一致:
检查设置
重新登录, 查看代理是否生效:
1 | $ echo $ALL_PROXY |
设置常用应用的代理
git
设置代理
普通http代理
git config --global http.proxy ``http://127.0.0.1:1234git config --global https.proxy ``https://127.0.0.1:1234- 单独给GitHub设置代理:
- 设置:
git config --global http.``https://github.com.proxy`` socks5://127.0.0.1:1080 - 取消:
git config --global --unset http.``https://github.com.proxy
- 设置:
ssh代理
如果使用ssh连接需要单独设置
- 编辑ssh配置文件:
.ssh/conf
1 | Host github.com |
取消代理
- git config --global --unset http.proxy
- git config --global --unset https.proxy
curl
使用参数, 临时代理
curl 使用代理的参数是 -x, 或 --proxy
1 | curl -x $ALL_PROXY http://www.google.com # -x 参数等同于 --proxy |
每次都代理
修改curl配置文件 vim ~/.curlrc, 写入以下字段:
1 | socks5 = "127.0.0.1:1080" |
参考
https://zhuanlan.zhihu.com/p/650171563?utm_id=0↩︎